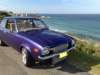
Cottees' 1987 Sigma GN GSR Super Edition
Re: Cottees' Sigma GN Build
Thanks for the heads up. One reason for posting about my build is to get feedback about it. I was thinking of moving the accelerator cable to a bracket that is mounted to the rocker cover. With the advice you have given, I'll definitely be doing that.


Re: Cottees' Sigma GN Build
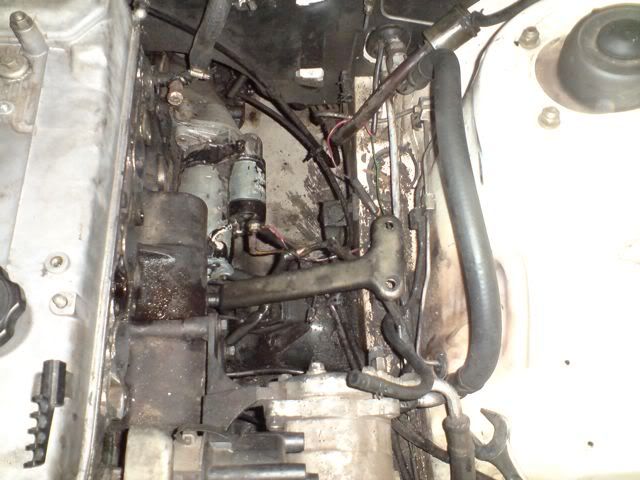
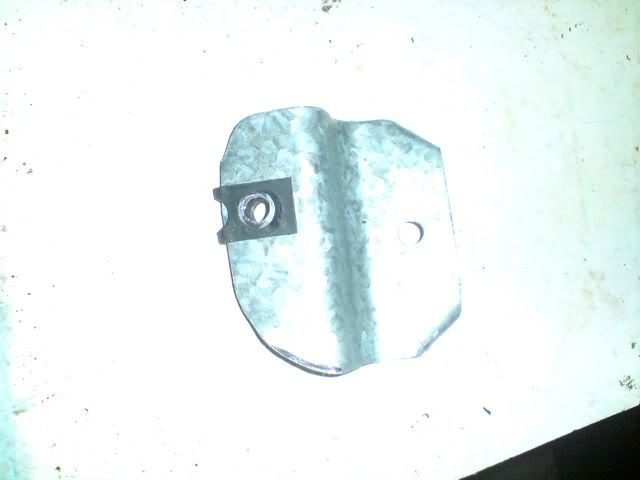
Test fitting a Magna bracket to support the weight of the large intake. Attaching this bracket with the Sigma bolt that attached the engine mount to the block with result in the bracket being too close to the engine, and wont match up with the bottom of the intake. A longer bolt from the Magna with a spacer would make it line up properly. On the Magna, the steering rack mount mounts to that bolt, that is why the bolt is longer in the Magna.
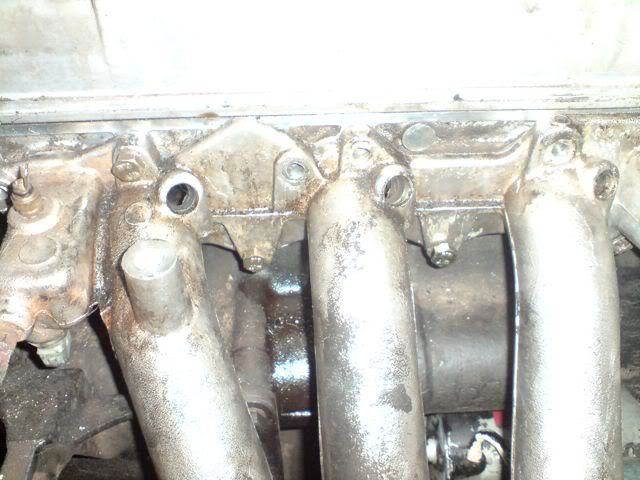
I went out and got some new bolts to replace the intake side head studs as with the studs, it is harder to get the intake into the engine bay.
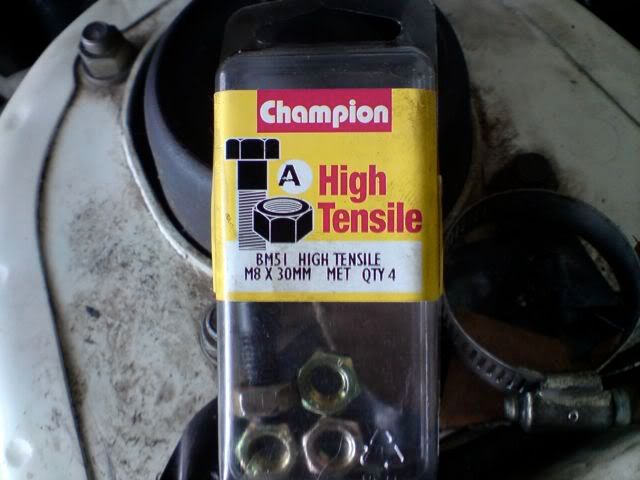
They fit ok, but they need washers and/or the next size down.
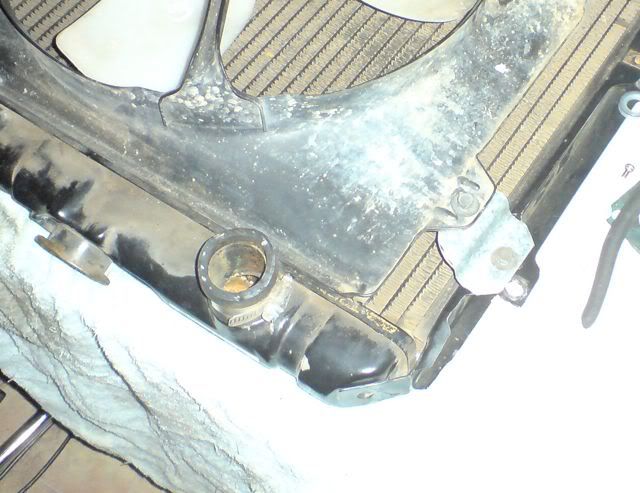
Since I have the thermostat at the rear of the intake, I have to find someway of getting that connected to the radiator at the front of the engine bay. In this test, I have used a Sigma top radiator hose + a Magna top radiator hose. I'll do a proper fit when I put the new radiator in.
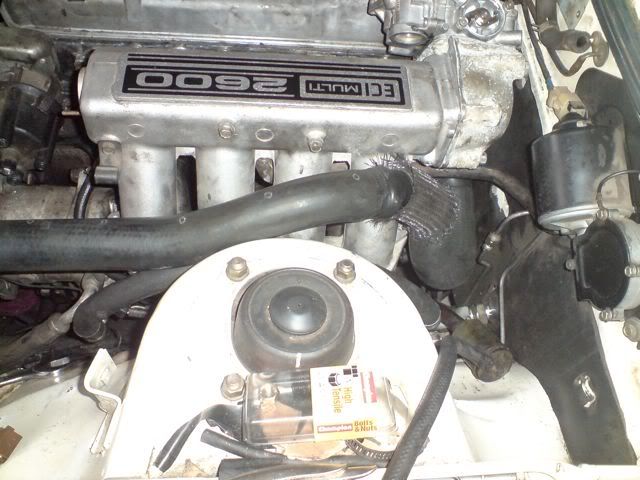
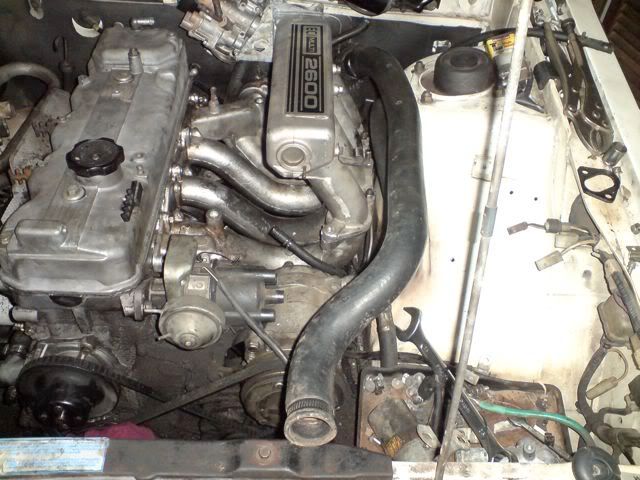
I also tried the idea of pointing the throttle body the opposite way, but the wiper motor is in the way.
I went out and got some new bolts to replace the intake side head studs as with the studs, it is harder to get the intake into the engine bay.
They fit ok, but they need washers and/or the next size down.
Since I have the thermostat at the rear of the intake, I have to find someway of getting that connected to the radiator at the front of the engine bay. In this test, I have used a Sigma top radiator hose + a Magna top radiator hose. I'll do a proper fit when I put the new radiator in.
I also tried the idea of pointing the throttle body the opposite way, but the wiper motor is in the way.
Last edited by Cottees on Sun Dec 20, 2009 10:51 pm, edited 1 time in total.
Re: Cottees' Sigma GN Build
I made a quick google sketchup of the top of the Astron II, intake plenum and the Water/Air Intercooler I was looking at. It looks like it would fit, but the bonnet might be too low.
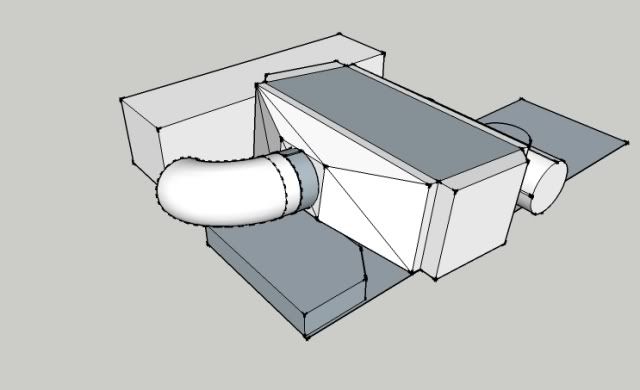
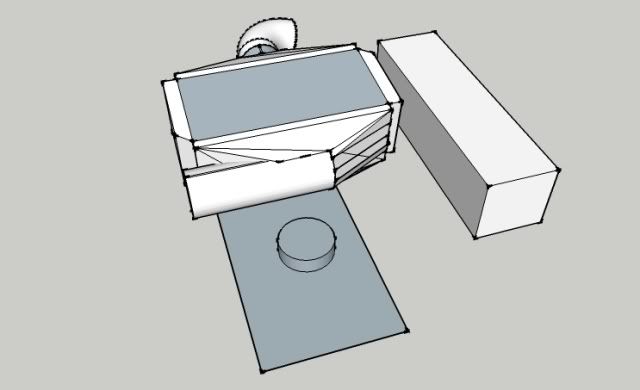
It might just fit under the bonnet. Also could have several small radiators or a long narrow radiator along the front bumper to cool the water from the intercooler.
It might just fit under the bonnet. Also could have several small radiators or a long narrow radiator along the front bumper to cool the water from the intercooler.
Last edited by Cottees on Sun Dec 20, 2009 10:51 pm, edited 1 time in total.
Re: Cottees' Sigma GN Build
thats interesting. out of the ordinary thats for sure.
with a core that size i would be concerned about its effectiveness as well as its flow capability.
what power output are you aiming for?
also, subaru RS turbos have a WAIC that may fit where you want it, might be worth a look
with a core that size i would be concerned about its effectiveness as well as its flow capability.
what power output are you aiming for?
also, subaru RS turbos have a WAIC that may fit where you want it, might be worth a look
Insert witty one liner here -->
Re: Cottees' Sigma GN Build
Yeah, I have seen the Subaru RS intercooler. There is one on ebay at the moment :
http://cgi.ebay.com.au/Water-to-Air-tur ... .m20.l1116
The Frozen Boost intercooler should be good for up to 350HP, which would be a good match for the Disco Potato. I would be happy with 160kW at flywheel. That would leave me with room to expand to 200kW+. From what I have read, Water/Air Intercoolers flow better than Air/Air Intercoolers.
Re: Cottees' Sigma GN Build
that setup on ebay is way overpriced, if you do decide on a suby one i can get one much cheaperCottees wrote:Yeah, I have seen the Subaru RS intercooler. There is one on ebay at the moment :
http://cgi.ebay.com.au/Water-to-Air-tur ... .m20.l1116
The Frozen Boost intercooler should be good for up to 350HP, which would be a good match for the Disco Potato. I would be happy with 160kW at flywheel. That would leave me with room to expand to 200kW+. From what I have read, Water/Air Intercoolers flow better than Air/Air Intercoolers.
a liberty with a waic struggles to make more than 150-170kw at 4 wheels with them, also they do heat up with continuous use so more of a short squirt use ideally.
Insert witty one liner here -->
Re: Cottees' Sigma GN Build
I have read the problem with heat soak with the water/air intercoolers. I still have some time to decide on what I am going to choose to go with. I just thought that a top mount water intercooler would eliminate a heap of piping, and also avoid having to run 3" pipes to the front of the car. If I go with a FMIC, I could get away with using 2.5" pipes, and use an intercooler with the intake and output on the same size. That would also require less pipes.
Unless I find a really good deal on a turbo and exhaust manifold, I might get the EFI conversion completed, then go out and get the turbo gear. I pretty much have everything except to get it done except for intake piping, and an ECU. The problem with doing the EFI conversion first, then do the turbo conversion later is the intake piping. I just have to either set something up for now, then re-do it when I go turbo, or set it up now with turbo in mind.
I am wanting this car for street and track use, so a water intercooler might not be the best option, but I have plenty of time to do the research, and see what options I have.
Re: Cottees' Sigma GN Build
to fit a fmic on a sigma is piss easy, the pipe work is VERY short and simple
and i didnt have to cut ANY bodywork to fit 2.5" pipe through, i had to trim the battery tray and the bumper bracket
come and look at mine if you want, although the TB is on the front of my manifold
also, it is easy to go efi then turbo later
thats what i did
and i didnt have to cut ANY bodywork to fit 2.5" pipe through, i had to trim the battery tray and the bumper bracket
come and look at mine if you want, although the TB is on the front of my manifold
also, it is easy to go efi then turbo later
thats what i did
Insert witty one liner here -->
Re: Cottees' Sigma GN Build
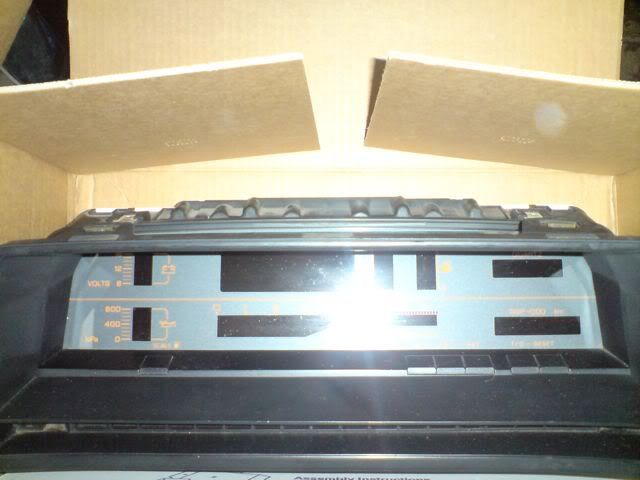
I just got the Magna Digital Dash in the mail. The photo is crap, but I'll take other pics later.
Last edited by Cottees on Sun Dec 20, 2009 10:52 pm, edited 1 time in total.
Re: Cottees' Sigma GN Build
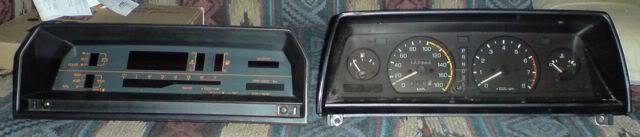
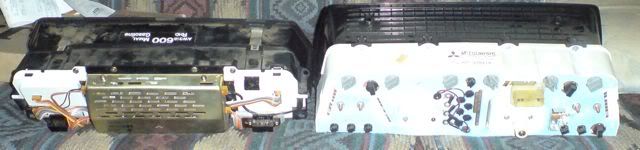
I took a comparison photo of the Magna TN Elite LCD cluster and the Sigma GN Cluster. They both look of similar size. Pretty much all that would need to be done is make up a custom surround for the LCD cluster, and it all should fit. Nothing a little fibre glass couldn't fix
Last edited by Cottees on Sun Dec 20, 2009 10:53 pm, edited 1 time in total.
Re: Cottees' Sigma GN Build
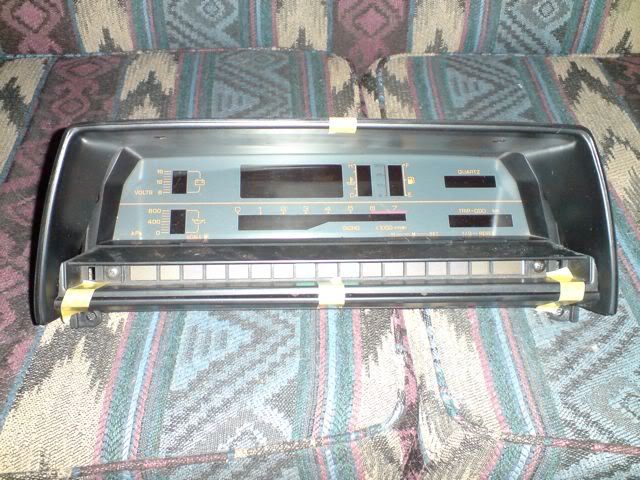
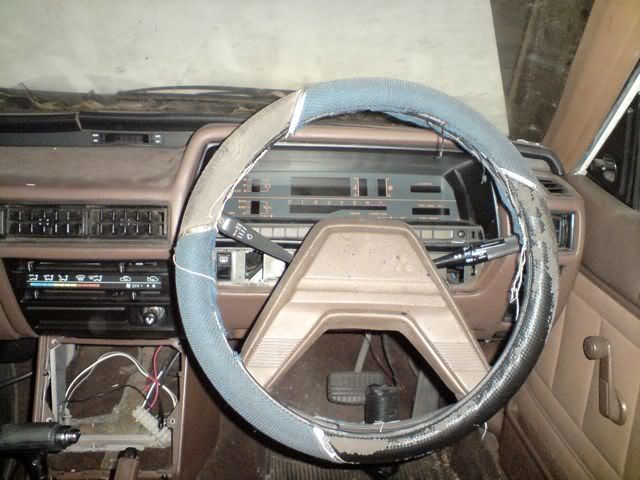
I have started to modify the surrounds for the clusters to get the LCD cluster to fit into the Sigma. It doesn't look the best at the moment, but it is enough to confirm that it'll fit.
Last edited by Cottees on Sun Dec 20, 2009 10:53 pm, edited 1 time in total.
Re: Cottees' Sigma GN Build
I did some more work on the cluster surround, and did a quick test fit into the Sigma to make sure it was fitting before I start putting it all together permanently.
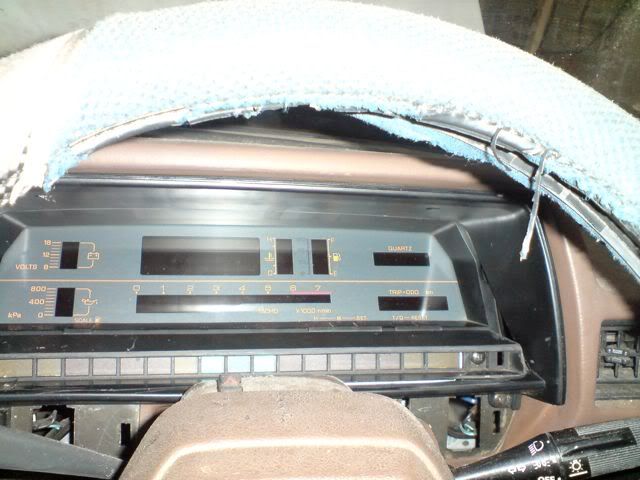

just realised looking again at the last pic, there is 2 clocks now, one on the cluster, and one at the top of the dash.
just realised looking again at the last pic, there is 2 clocks now, one on the cluster, and one at the top of the dash.
Last edited by Cottees on Sun Dec 20, 2009 10:54 pm, edited 1 time in total.
Re: Cottees' Sigma GN Build
Looks pretty good. Reminds me of one that i saw in a Galant once... Oh wait, that was my Galant. Looks like its coming along pretty good there. Was thinking of doing it to my GK, ya might have motivated me a bit to finally get off my ass and do something about it on these rainy days were having. Have fun with the wiring aswell, I know i did.
FYI's
Dont cut you origional plugs for the origional dash off of the loom, just join the new ones on to the origional wires so if something happens to the digital dash you can quikly and easily put the old dash back in.
Dont forget to get a kit from Jaycar to correct the speedo aswell, pretty easy and simple to use.
In the Galant (dunno about Sigma's) the fuel gauge was a bit funny cos of the sender. It read empty when full, then as it got emptyier it read full and then went back down to empty when it got really low.
2* 73 A53 16L Dodge Colt (Plymouth Cricket), 2* 73 GB Galant Sedan's, 1* 74 GB Galant Sedan, 1* 76 VK Valiant Regal,
1* 79 GE SE Sigma Sedan, 1* 81 GH Sigma PWS, 1* 84 GK Sigma SE, 1* 85 GK Sigma GL - Replacing the 84 GK SE, 1* 91 GTO - FOR SALE

1* 79 GE SE Sigma Sedan, 1* 81 GH Sigma PWS, 1* 84 GK Sigma SE, 1* 85 GK Sigma GL - Replacing the 84 GK SE, 1* 91 GTO - FOR SALE
Re: Cottees' Sigma GN Build
I have only done part of the surround at the moment. I need an elite dash loom and electric speed sensor to get it all wired up. I should be able to get one from U-Pull-It next week. GB_BB4C has done a similar mod in their Galant. They said that all worked except for the fuel gauge. For my mod, I can see already that it wont work without some electrical mods. I can either use a modified Magna fuel sender unit, or alter the reading that the Sigma sender unit sends. The resistance range the Sigma uses is higher than what the Magna uses. The Magna sender unit wont bolt to the Sigma tank since the Magna sender unit is on the side of the tank where as the Sigma's is on top. As for the surround, I have used the Sigma surround and trimmed it a bit, and got the Magna surround and cut out the cover for the bottom row of lamps. There is a gap between the Sigma part of the surround and the cluster that I have to fill in, but it looks to be fitting ok.
Re: Cottees' Sigma GN Build
lol, when Googling for digital dashes, it was your post on the old forums that made me think of using a Magna Elite cluster. Then a couple days later one appeared on ebay.
Re: Cottees' Sigma GN Build
Doing well mate, Had a good laugh at the pic with the oil and coolant everywhere. Reminds me of all the mess and me and my brother made in our parents driveway over the years.
Re: Cottees' Sigma GN Build
Started to make the brackets to mount the TR engine fan onto the GN radiator. Once I have finished all 4, I'll spray it black to make it look a little better.
Last edited by Cottees on Sun Dec 20, 2009 10:55 pm, edited 1 time in total.
Re: Cottees' Sigma GN Build
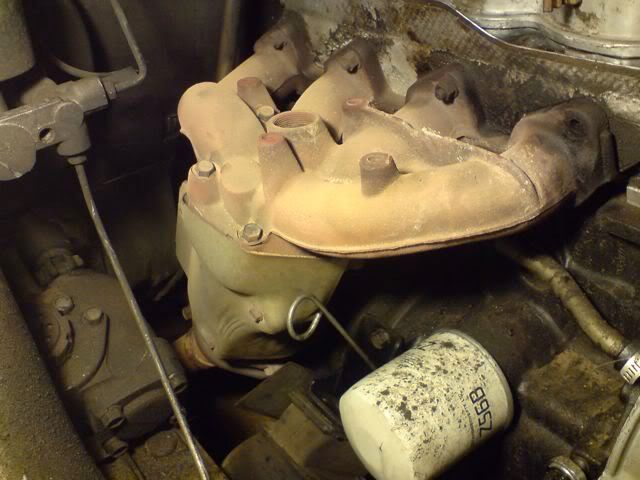
I had an idea of making an adapter that goes from a GN exhaust 5 bolt cat converter to a T2/T3 flange. If I did that, it looks like that a turbo would fit under the manifold, if it wasn't for the oil filter. It might work if I relocate the oil filter, or did some cut and welding to the manifold. I could cut the manifold off the exhaust flange and either tilt it up, or flip it upside down. I havn't done much welding, so I am not sure how well cast metal welds. If left where it is, there would need to be a heat shield for the engine mount. Another idea was an adapter but instead of mounting the turbo under the manifold, have a U pipe that mounts the turbo next to the manifold, but brought forward enough to clear the brake master cylinder. Another idea for relocating the turbo would be a J pipe that would mount the turbo in front of the manifold and have the turbo upright so either the intake points up, and the exhaust points down, or vice versa. the dump pipe could go over top or under the manifold. I know having a turbo mounted upright is unconventional, but so is my intake. Might as well have it matching both sides.
Last edited by Cottees on Sun Dec 20, 2009 10:56 pm, edited 1 time in total.
Re: Cottees' Sigma GN Build
man theres a manifold on ebay right now, cheap at 330 lol, u can weld onto the cast, very tricky and alot of welders wont do it, but apperantly the trick to it is to heat the cast up with a oxy first and then weld, not sure but its what im led to believe, correct me if im wrong fellas, not sure.
69 vf valiant coupe 225 efi turbo
74 gc galant 2.6 stroker 3.0
lpg c10 9 inch gt 4088 roller
74 gc galant 2.6 stroker 3.0
lpg c10 9 inch gt 4088 roller
Re: Cottees' Sigma GN Build
I would like the manifold on eBay, but I am going to be French and give up for now. I could buy the manifold, or spend the day at U-Pull-It. I might just spend the day at U-Pull-It. I love that place. Like a candy store, but for car nuts.
Re: Cottees' Sigma GN Build
lol, thats cool, yeah i love it to, but never find time, i once found a pound of skunk in a car there, a vb commo, and also a shit load of cash in a console of a gj siggy, around 700 bucks i think it was from memory, long time ago.
69 vf valiant coupe 225 efi turbo
74 gc galant 2.6 stroker 3.0
lpg c10 9 inch gt 4088 roller
74 gc galant 2.6 stroker 3.0
lpg c10 9 inch gt 4088 roller
-
EVL076
- S-G Veteran
- Posts: 480
- Joined: Mon Mar 16, 2009 10:08 pm
- Location: Baggin' 4th and chirpin' 5th
Re: Cottees' Sigma GN Build
good luck with it all, but next time your out at super cheap, buy a few cans of degreaser mate, they are onyl $2 a can
i would be embarrassed to show pix of my engine bay, if it was as filthy and nasty as that
i would be embarrassed to show pix of my engine bay, if it was as filthy and nasty as that


Re: Cottees' Sigma GN Build
lol. I don't know if you'd believe me, but I have already used up 3 cans of the stuff on that engine bay so far. At the moment I am not too worried about it being messy. Once I get everything sorted out and fitting where it should, that is when a major clean + assembly gets done.
-
EVL076
- S-G Veteran
- Posts: 480
- Joined: Mon Mar 16, 2009 10:08 pm
- Location: Baggin' 4th and chirpin' 5th
Re: Cottees' Sigma GN Build
Cottees wrote:lol. I don't know if you'd believe me, but I have already used up 3 cans of the stuff on that engine bay so far.
DAYUM it musta been bad then
Re: Cottees' Sigma GN Build
hahahaha i used over 20 cans on my engine bay, most on the block and manifolds when it was out, but the bay itsself too, works great when hot, but the fumes knock you to the ground ahah
76' GD A57 rebuild Full Album - http://www.facebook.com/album.php?aid=1 ... 29ef74e1d8
Re: Cottees' Sigma GN Build
If your going to use the TR/TS knock sensor it goes in one of the small welch plug holes just above the inlet side balance shaft.Cottees wrote:I am considering drilling the block to fit a knock sensor, but I can see it ending badly.
2* 73 A53 16L Dodge Colt (Plymouth Cricket), 2* 73 GB Galant Sedan's, 1* 74 GB Galant Sedan, 1* 76 VK Valiant Regal,
1* 79 GE SE Sigma Sedan, 1* 81 GH Sigma PWS, 1* 84 GK Sigma SE, 1* 85 GK Sigma GL - Replacing the 84 GK SE, 1* 91 GTO - FOR SALE
1* 79 GE SE Sigma Sedan, 1* 81 GH Sigma PWS, 1* 84 GK Sigma SE, 1* 85 GK Sigma GL - Replacing the 84 GK SE, 1* 91 GTO - FOR SALE
Re: Cottees' Sigma GN Build
The knock sensor on the TR/TS mounts near the top of the block between the 2nd and 3rd inlet port. The closest welch plug is one under the 2nd intake port, and is larger than the knock sensor. It still might be possible to put something into that hole the size of the welch plug, but thicker, then drill a hole into that, then tap the hole with a thread matching that of the knock sensor. It might be close enough to the original position to still work. This could be done to the welch plug too, but I don't know enough about them to say. I get the feeling they are too thin.
-
DanTurboLancer
- Posts: 1382
- Joined: Wed Mar 25, 2009 1:19 pm
- Location: Newcastle N.S.W Australia
Re: Cottees' Sigma GN Build
hehe You are a Thinker Cottees!!
But I dont think this would be advisable,
The Knock sensor picks up the Knock/Detonation/Rattle caused by miss fires.
This 'Knock' travels through the solid steel of the block and is picked up by the sensor.
If you place the Sensor in the Welch plug
Is is no longer attached to the solid metal of the block,
instead it is screwed into a thin, different material, that is then going into open space,
albeit coolant in the galleries.
It just cant do the same job.
Re: Cottees' Sigma GN Build
I can probably live without the knock sensor for now. If I do need it, I can just drill a hole into the block where the Magna has it, and tap the hole. It might be one thing I get done professionally rather than attempting myself. I could always use it as an excuse to tear down the engine and do a rebuild.
Re: Cottees' Sigma GN Build
Current to do list for the bare minimum to get the Sigma running for the next SA meet:
- Clean the engine bay!
- Finish intake elbow
- Dismantle and clean Throttle Body
- Run pipe for intake
- Make an air box
- Modify the TR/TS loom to fit and patch into the Sigma loom
- Get an ECU
- Magna head or intake adapter plate
- New gaskets for intake. For the intake, head and exhaust if a new head is used
- Fuel pump, probably from a VL
- Block the air injection hole in the exhaust manifold. Probably going to use it for the O2 sensor
- Make 2 more fan to radiator brackets
- Find somewhere to mount the water temperature sensor
- Reassemble the front end.
- Register it
Optional:
- Install the LCD loom and cluster
By making that list, and checking it twice, I don't think I'll be making the next meet. Might make it for the following one though.