Page 3 of 24
Re: Cottees' Sigma GN Build
Posted: Wed Jul 22, 2009 10:30 pm
by lpgalant
why do u need a intake adapter for manifold................. to head, its astron 2 isnt it
Re: Cottees' Sigma GN Build
Posted: Wed Jul 22, 2009 10:38 pm
by Cottees
I am using an unmodified intake from the Magna, so the thermostat housing is at the back. On the Astron II on the Sigma, the rear coolant intake is too small, and an adapter is needed to stop the coolant going in the wrong places. A Sigma intake gasket might solve that problem for now, but a new Magna head would still be a better head than what I have now.
Re: Cottees' Sigma GN Build
Posted: Wed Jul 22, 2009 10:44 pm
by lpgalant
yeah, so open the hole up abit, thats all, weres the coolant gonna go, im not sure what ur on about, pics if u can, but might be easier than u think dude, ive done it with no drama..........not trying to be a smart arse dude, just offering advise as i think u might be ok.
Re: Cottees' Sigma GN Build
Posted: Wed Jul 22, 2009 10:54 pm
by Cottees
The rear port is between intake port #3 and #4. In the Magna head, it is the same size as the port in front of intake port #1.
Re: Cottees' Sigma GN Build
Posted: Wed Jul 22, 2009 11:02 pm
by lpgalant
itll still flow, open it up a little more and itll be ok.
Re: Cottees' Sigma GN Build
Posted: Wed Jul 22, 2009 11:34 pm
by Cottees
The 2 main problems is head and ECU. With the head, it is as I stated above, and the ECU is either try and find a stock ECU for now, or just spend the money and get the Aftermarket one. The Megasquirt II is pretty cheap if I assemble it myself, but I am not sure if my soldering skills are that good.
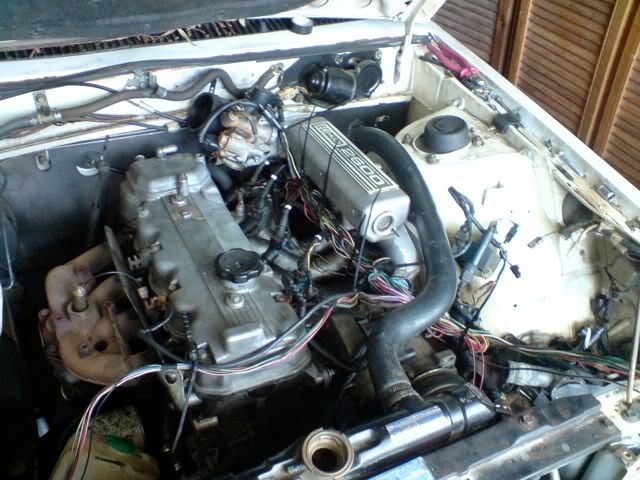
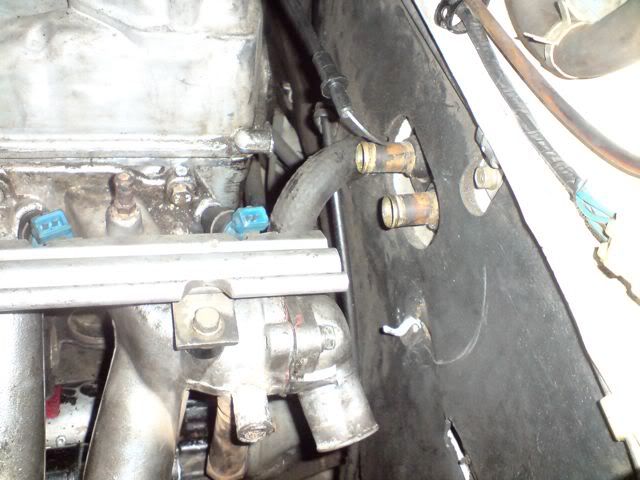
I just tried putting the O2 sensor into the air injection hole in the GN's exhaust manifold and it fits. It fits a little too well though. There is a larger opening that the injector screws on to, and under that is a smaller hole that leads to the inside of the manifold. The threaded part of the O2 sensor fits into the smaller hole, but is around the same width, so tapping it would result in it not fitting. The larger part of the hole that the injector screws to would need to be cut off since it would be next to impossible to tighten the O2 sensor properly with it still there.
Re: Cottees' Sigma GN Build
Posted: Wed Jul 22, 2009 11:50 pm
by Cottees
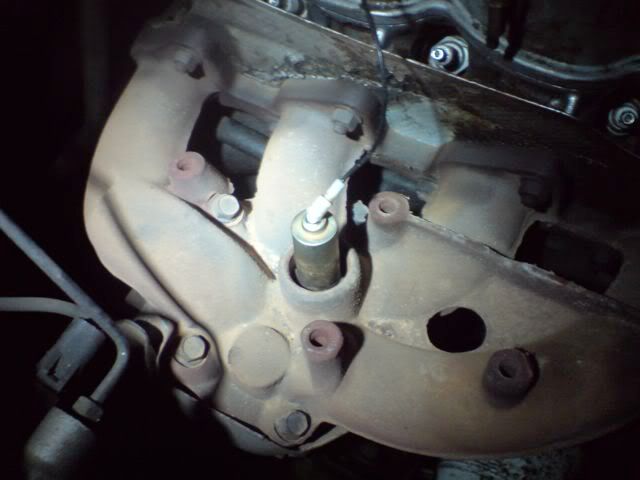
A pic showing the O2 sensor in the air injection hole.
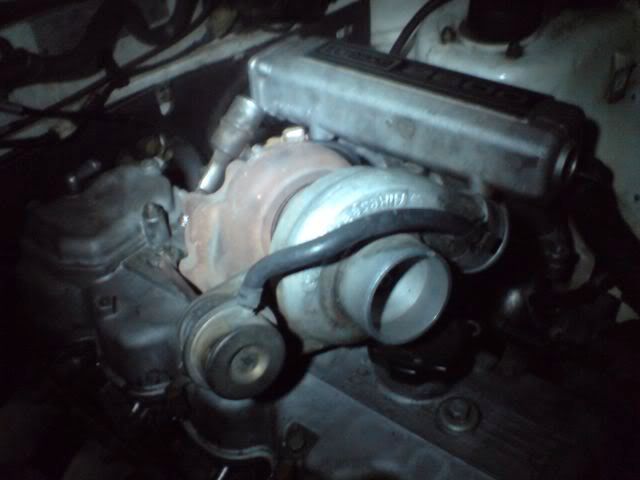
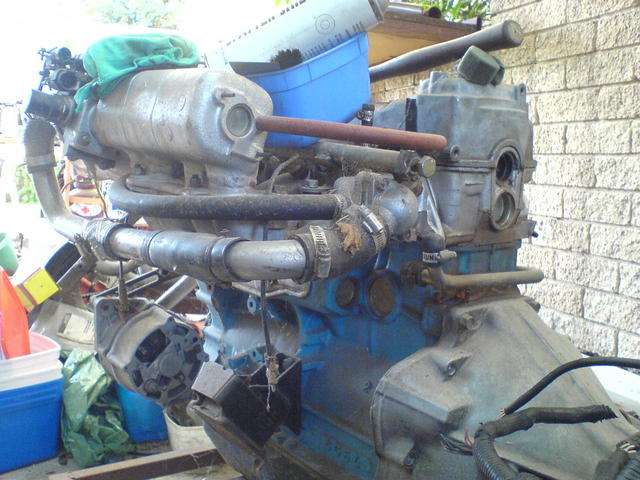
Just a quick pic of my tiny turbo.
Re: Cottees' Sigma GN Build
Posted: Fri Jul 24, 2009 3:48 pm
by 81GL
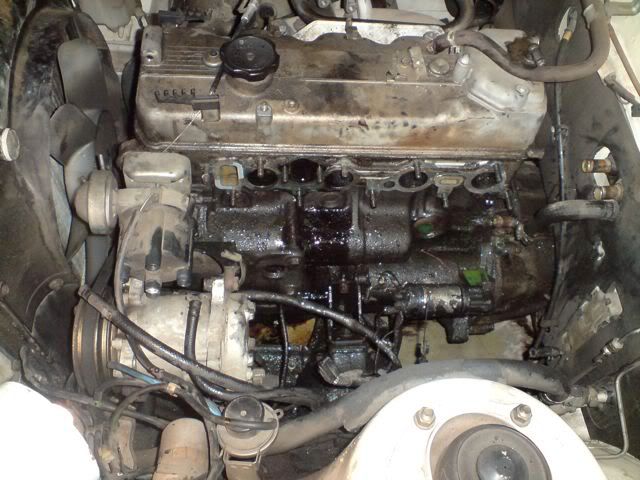
Hmm, think you will find that by putting that manifold onto the head with the rear water gallery as is, it will leak like crazy (as in gush out), due to the head being recessed around the outlet?
Or is that what you were referring to above?
Nick.
Re: Cottees' Sigma GN Build
Posted: Fri Jul 24, 2009 3:54 pm
by Cottees
Yeah, that's why I am planning on getting a Magna head to replace my current head.
Re: Cottees' Sigma GN Build
Posted: Sun Jul 26, 2009 7:59 pm
by Cottees
Just got back from U-Pull-It North with some part to get my Sigma running
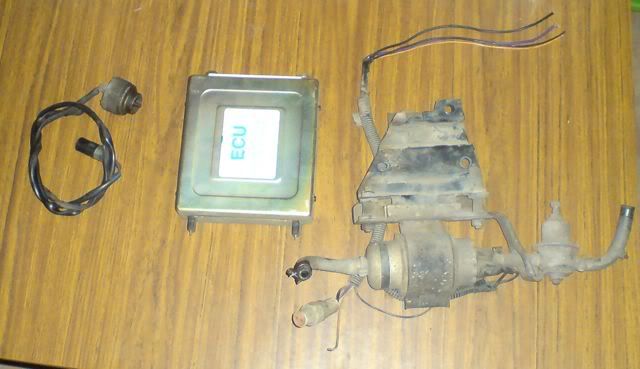
Speedo Pulse Generator, Early TR Manual ECU (was found in an Auto), VL petrol pump + mounting
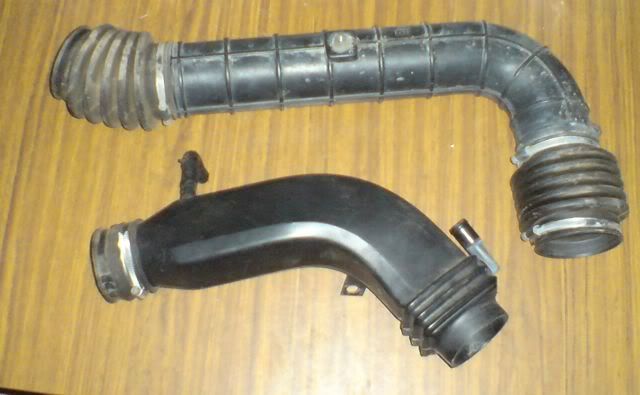
Some intake pipes from a VN and a VL. Might help with making up an intake pipe
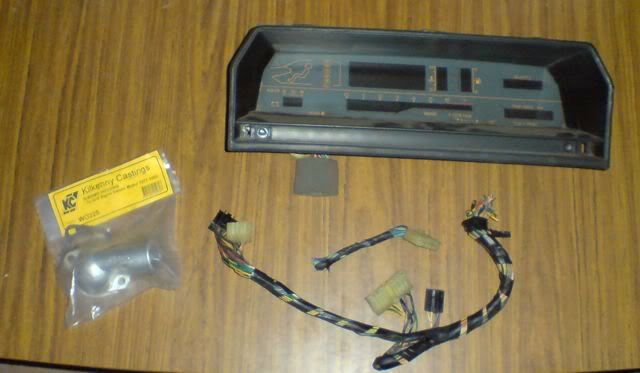
Brand new thermostat housing for an early Sigma, TP Auto Digital Dash, Digital Dash loom
The thermostat housing should give better clearance from the firewall, and it was only $6. There was a stand near the entrance with a heap of brand new thermostat housings going for $6 each. I was going to get the fuel sender from the TP Elite, but I forgot. There is always next week though. From the looks of the price board, getting Flywheel to Drive Shaft would set me back $250-$300. At the moment I am going to concentrate on getting the EFI complete and running. As soon as I can get the engine running, and have the money, that auto trans is getting the scrap. Unless someone wants it, and they can buy it cheap. That is IF I can find a narrow KM132. I did see what looked like a KM132 in a GN today, but looks to of been on a 2.6L, and the part that the gear stick mounts to was cracked. I also had a better look at the Scorpions while I was there. I only saw 1 GJ Scorpion, and it's front was smashed. More pics will be taken once I start putting all the parts together.
ECU:
Mitsi Part No. AW319647
Bosch Part No. 9 260 060 023
Fuel Pump:
Bosch Part No. 0 580 464 050
Re: Cottees' Sigma GN Build
Posted: Mon Jul 27, 2009 1:38 pm
by panda
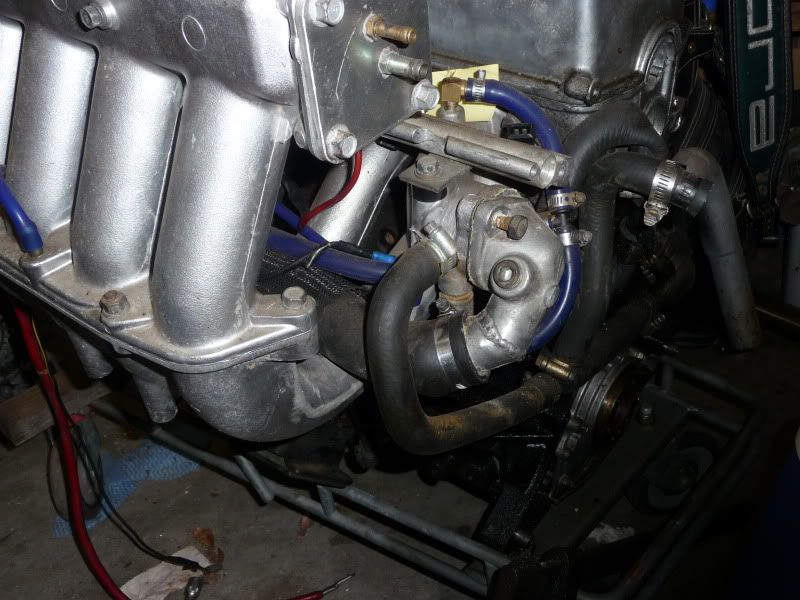
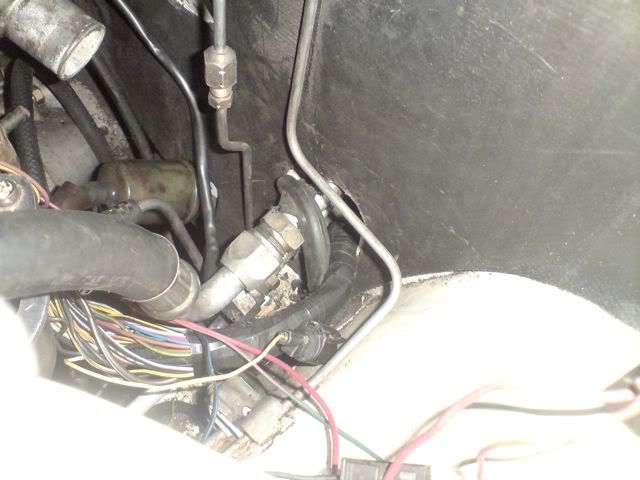
I too take the water outlet from the head at the rear of the head, but to get the correct angle of the thermostat housing, I fitted a brand new stock housing from a 75 GC Galant, which bolted straight on.
Then using some rubber bends & some copper pipe, routed the return pipe to the radiator just above the inlet runners of the TR/TS manifold. (All bends were sourced from a single VR Commodore top hose)
Other than getting all of the air out of the system, it works fine. COOL !

This method keeps the lower section of the inlet manifold totally stock.

Not the best photo, but might give you some ideas.
Re: Cottees' Sigma GN Build
Posted: Mon Jul 27, 2009 2:39 pm
by Billsy
i run the thermostat at the back aswell, i used a tj magna thermostat housing as its got a very long outlet, then cut it and welded it on the perfect angle.
then... used a combination of magna and commodore hoses to connect it up like panda did
just put a commodore air bleed nipple in the manifold at the top end to easily bleed the air out
Re: Cottees' Sigma GN Build
Posted: Mon Jul 27, 2009 5:40 pm
by GB_BB4C
The thermostat housing you want and i used is a WO22. I then used 2 of the stainless pipe from a VN commy to get it up to the front.
Re: Cottees' Sigma GN Build
Posted: Mon Jul 27, 2009 9:45 pm
by Cottees
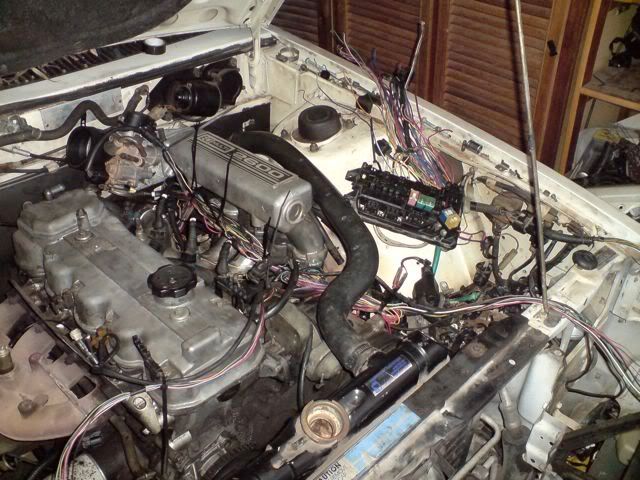
I have started pulling apart the TR loom and pulling out wires that are not needed. Since the Sigma already has wiring for lights, I wont need the Magna's lighting wiring.
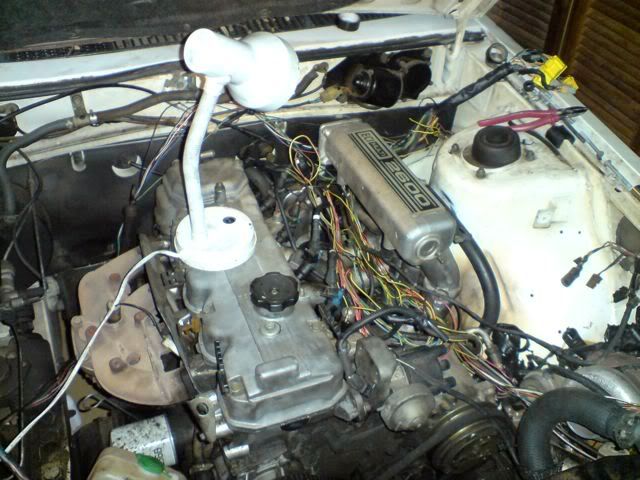
Look at all the pretty colours...
I am thinking of running the top radiator hose next to the plenum and above the A/C hose instead of under the intake manifold. That would make it the highest part the coolant system, and would be the best place to put in a nipple for bleeding out air. There is a test pic of it on page 2.
Re: Cottees' Sigma GN Build
Posted: Mon Jul 27, 2009 10:50 pm
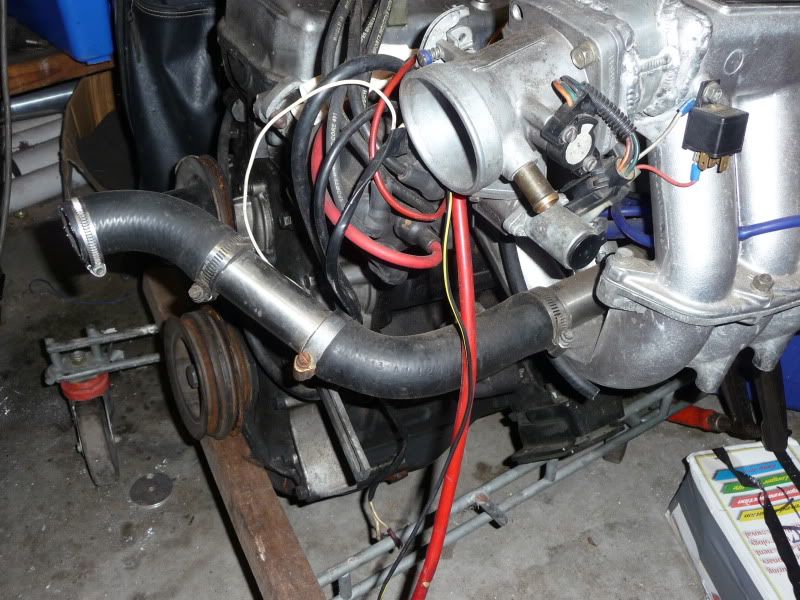
by Billsy
this is what i did.
Re: Cottees' Sigma GN Build
Posted: Tue Jul 28, 2009 10:23 am
by panda
Yep, my set up is almost the same as the pics posted by Billsy. Has proven extremely reliable.
Re: Cottees' Sigma GN Build
Posted: Tue Jul 28, 2009 1:51 pm
by Cottees
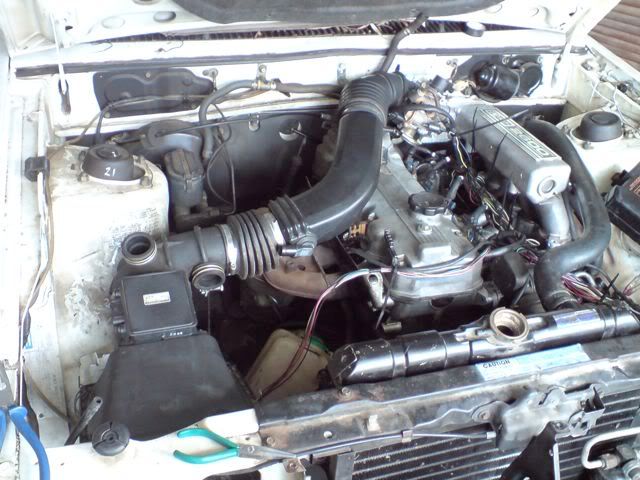
I start late at work today, so I thought I'd get in and do some more work on the Sigma.
I ran into a little problem. There is very little space between the radiator and the water pump, and the TR main fan wont fit.

Since I put the radiator back in, I thought I'd put the temporary top radiator pipe in too.
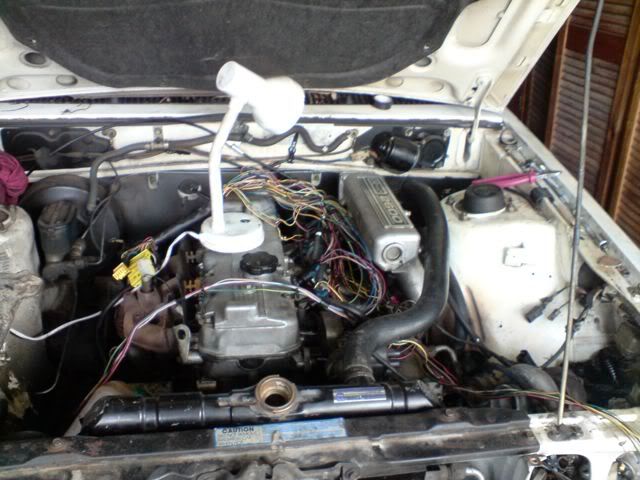
I test fitted the second fan off the TR. It fits. Just.

I have neatened up half of the loom with cable ties, then when everything is all good, I am going to take it out of the car, and tape it up. I have also put some labels on some of the loose wiring so I can remember where they go.
I have started with the second half of the loom. I'll have to remove most of it since only a small part is for the EFI stuff. The fuse box is a little wonky at the moment, but will be mounted in properly later.
Re: Cottees' Sigma GN Build
Posted: Tue Jul 28, 2009 2:53 pm
by panda
I was going to fit an electric fan in mine (one day) but the original works fine, but I do have a 3 row radiator, & kept the original shroud around the fan to maintain the fan efficiency.
Also I see you haven't fitted the Magna dizzy yet, unless you are using an after market fuel only ECU.
You are making great progress, keep it up.
Re: Cottees' Sigma GN Build
Posted: Tue Jul 28, 2009 3:10 pm
by Cottees
I have a Magna Dizzy next to the car at the moment, and would have been in those photos today if it wasn't for one problem. Trying to get the old one out, it gets stopped by the AC compressor bracket. I can't fully withdraw the dizzy to get it out. I was going to put the Magna dizzy in to get the wire length right, but it should be ok. I'll probably just take the dizzy out when I get the new head, and put the new one in when putting the new head back onto the block. I wont really need the new dizzy in there till I get the new head anyway.
Re: Cottees' Sigma GN Build
Posted: Tue Jul 28, 2009 6:26 pm
by Undies91
I have to say that the way ur goin ull make the 22nd of august no problems.
if not ill have to swing by and pick u up

Re: Cottees' Sigma GN Build
Posted: Wed Jul 29, 2009 12:22 pm
by panda
Cottees, I just remembered that when I did my conversion, I blew up my Magna dizzy by running it off 12 volts from my Haltech ECU. After speaking with the guys at Haltech, they say Magna dizzy's should run at 5 volts.
But if you are running a factory ECU, you won't have a problem.
BTW - no need for air conditioning in my Rallycar

Re: Cottees' Sigma GN Build
Posted: Wed Jul 29, 2009 1:25 pm
by Cottees
Yeah, at the moment I am going with a factory ECU.
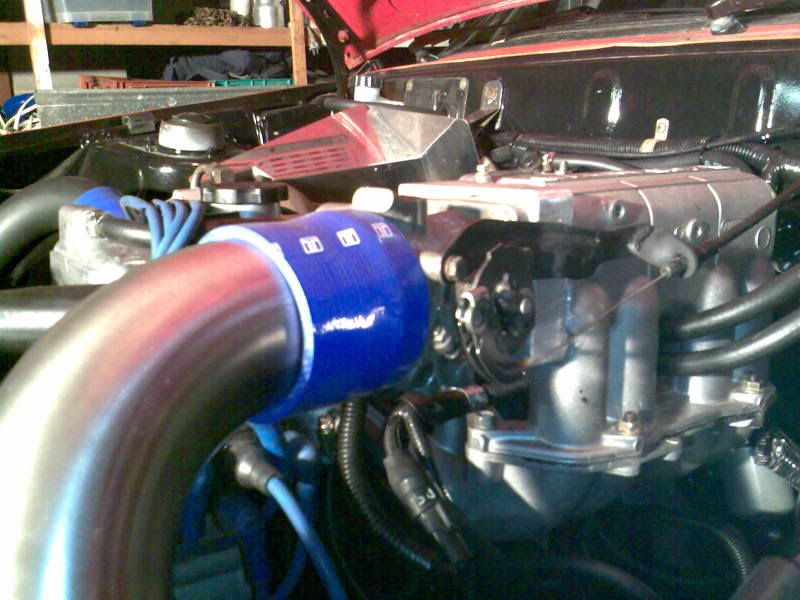
I have done a little more to the car today. I have put together some intake pipes from a couple cars, and it seems to all fit.
I have mounted the accelerator cable to the back of the rocker cover where the Magna's water pump mounts. it doesn't work properly here, but I'll fix it later.

Re: Cottees' Sigma GN Build
Posted: Thu Jul 30, 2009 8:55 pm
by Cottees
I was bored so I was on ebay looking at engine fans. This one looked interesting
http://cgi.ebay.com.au/HIGH-PERFORMANCE ... 286.c0.m14 , so I went out to the car to do some measuring. The stock radiator core has a height of 395mm and width of 485mm. The usable space between the core and the water pump is around 75mm. The fan on that ebay auction is pretty thin, but would still be 10mm too thick to fit.
While I was out at the car, I decided to try shutting the bonnet to see if it would actually close with everything in there at the moment. It closes at the moment without problem, but there are a few points that touch the bottom of the bonnet. Around 1/3 of the intake pipe closest to the throttle body, one of the pipes from the idle control and the second bend on the coolant hose from the radiator all touch the bonnet. I also have a bonnet liner on there that is pretty much what they all are touching. Since it is just intake and some coolant hoses that are touching, it shouldn't be too much of a problem since they wont get to the temperatures the exhaust will. It should be ok so long as no one jumps on the bonnet, or decides to walk in front of me while I am driving, but a couple things touching the bonnet would be the least of my problems.
Just double checked that auction. Later in the description, they quote the measurements of the fan to be 15.75 X 16.25 X 3.1". The thickness of the fan they also say is 85mm. 3.1" is not 85mm, it is 79mm. That is still a little too thick by a couple mm. They also have for sale a 9" wide fan
http://cgi.ebay.com.au/HIGH-PERFORMANCE ... .m14.l1262 . Two of these could be used next to each other, and still fit with room.
Re: Cottees' Sigma GN Build
Posted: Fri Jul 31, 2009 12:33 am
by vr4sigma
dude dont buy the crap fans from ebay, its not worth the effort,
Re: Cottees' Sigma GN Build
Posted: Fri Jul 31, 2009 8:53 am
by 81GL
As above mate,
Steer clear of those fans for the primary cooling fan. brought two of those 9" ones a while back to check them out. bloody puss!
Either stick with the standard set up, or alot of people use the davis craig fans - Do not skimp on the cooling system. period.
Looks like some good progress though.
Nick.
Re: Cottees' Sigma GN Build
Posted: Fri Jul 31, 2009 9:05 am
by Cottees
At the moment I am sticking with the stock fan. I do want to change to an electric fan eventually. Looking at those fans was more research cause I was bored. I was a little suss of them anyway. Around $100 for a fan at Super Cheap Auto, and $30 for them.
Re: Cottees' Sigma GN Build
Posted: Fri Jul 31, 2009 11:00 pm
by Cottees
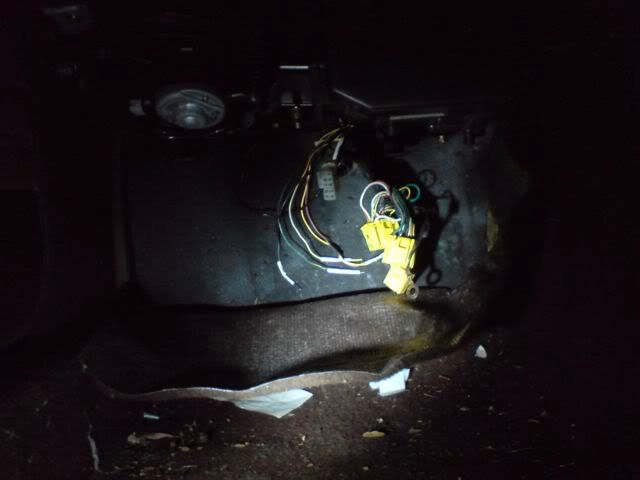
Today I decided to look behind the dash and see if I could find a good place to put the loom through. When I looked on the passenger side of the car, I saw a hose sticking out of the carpet.
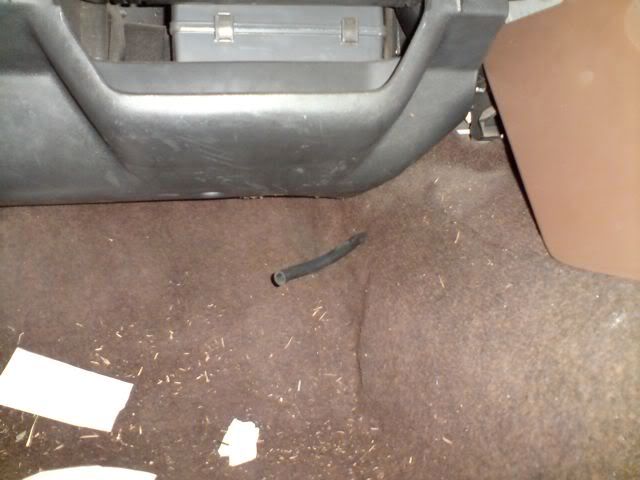
I pulled back the carpet a bit to find out where this mystery hose leads. Upon moving the carpet, I discovered it led nowhere. So, it still remains a mystery.
Earlier I taped most of the loom together, then fed some of the loom through the hole in the firewall where the AC hoses go, then found out that everything wasn't long enough to reach the injectors etc., so I had to take the loom apart again. I forgot to take pics of the loom through the firewall, but may take some tomorrow. That leads to the new problem I have. The intake hose into the fuel rail is too long and the firewall gets in the way. I am thinking of cutting it shorter, and attaching a normal fuel hose to it with a clamp. If I cut the hose, I will have to make a lip at the end of it so the clamp doesn't just slip off.
Re: Cottees' Sigma GN Build
Posted: Sat Aug 01, 2009 11:14 am
by COBWBS
mAn i have a manifold hear u can have for free..
already modifyed
Lookin at this makes me feel ill
PM me ur address and 10 bux for postage
u will be the happest guy on earth.
Re: Cottees' Sigma GN Build
Posted: Sat Aug 01, 2009 4:16 pm
by Cottees
lol. Aww... don't be hating my Sigma just cause she's different!
When you say modified, do you mean the plenum or the thermostat housing or both?
I have the loom running into the cabin now.
It is through the same hole as the AC pipes. I am going to cut the rubber grommet to fit the loom a bit better, and insulate the loom.
Re: Cottees' Sigma GN Build
Posted: Mon Aug 03, 2009 9:04 pm
by COBWBS
I got the top half.
Ur bottom half is fine.
PM me.. And if ur not gonna use it tell me coz ill sell it for 50 bux..
Im only giving it to u coz ur struggeling.
hears a pic